by Alexandra
With frequent practice and strict adherence to the elementary steps and tips below, setting up camping tents will not be overly daunting.
Contents
A correctly set up tent will protect you against scratches, rain, or some different outdoor nuisances for a relaxing night's sleep.
The tent installation process will probably differ from tent to tent. Most contemporary types possess an inner compartment, a flysheet, and poles that shape a patio or tunnel-like structures. These tent types will follow the steps outlined below. Kindly remember that setting up a tent employs pinpointing the camping location potential.
Below are the steps you should follow when setting up a tent:
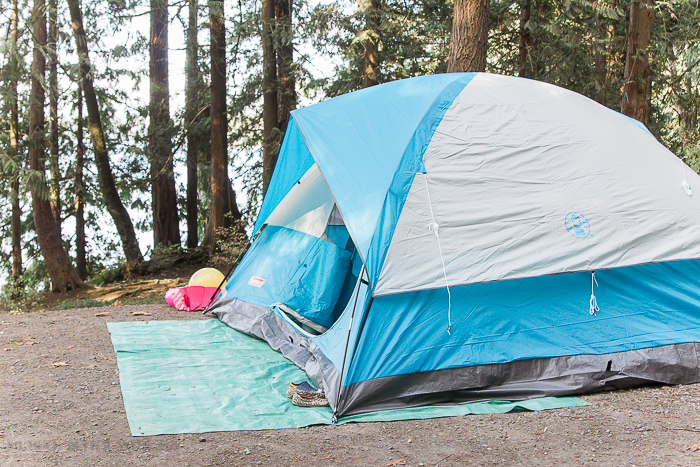
The very first step will be to layout the tent's footprint by merely laying a protective tarp or groundsheet on the ground. The tarp supplies a barrier between the base of this tent and the ground. It protects the tent from gathering moisture from underneath, improving the tent's general lifespan. Picking the right tent is also essential; neither the tent will not perform well at the camping spot. Like it can be damaged if the weather is terrible and storm stats or else the material get spoil due to the bad weather condition. But do you what the best tent brands on the market are. If not, read this brief guide on it.
The tarp additionally aids in smoothing the ground for extra relaxation and keeps your tent base clean from dirt, wetness, or dust when packing.
When the footprint is larger than the tent's ground, make sure you examine the visible borders under. This ensures that the water collected by the rainfly will not get under the tent base across the tarp.
Unfold the tent, spot the base of this tent and put that side in addition to the tarp or groundsheet considering account where you would like the doorway to be. The management of this door will soon be particularly important to factor in when using a tent as it'll be difficult to reposition it set up.
Separate outside the tent poles and fly and prepare the pegs/stakes for use. Maintain a list of the number of tent hooks to counter-check when packing.
Tent poles are usually in pieces that are linked together with a stretchy cord or bungee principles to create them searchable and better to store. Ready the tent poles by connecting the sections and put them out around the horizontal tent. Check with the guidelines manual or join the poles with amounts or colors; otherwise, you can tag them for ease.
The interlinked portions of the tent poles dictate they must be connected using a push action instead of a pull action. Pulling may detach the tent poles and lead to more frustrations when setting up the tent. Many tents require two tent poles crossing one another to create an X as a part of the frame.
How to Save Money with Solar Panels
Some tents will require you to join to the outside fly before clipping from the inner side. In cases like this, place the ends of these poles to the pole attachments. Bend the poles to fit the place, and lastly clip at sides and the top of the inner tent on the poles.
On the other hand, other tents have sleeves/flaps compared to having clips to attach with the poles. Slip the tent poles through the sleeves secure the rod ends into the attachments at the base of this tent. Some tents even provide a tie at the peak of the inner tent keep the poles complete with the top with a bow.
Staking your tent holds the tent and whatever else inside, in one place in the event of sudden gusts of wind. Ensure the door is facing the ideal direction away from the wind's leadership, before staking the tent. If it is twisting the tent and tarp while in the perfect direction.
The poles for a self-standing tent will bend in place to raise the tent while at a regular tent, you may be asked to turn the poles and lift the tent in place slowly.
Use a peg/stake to fasten the four tent corners into the ground. Add some tension on the tent by merely pulling the corners before setting the stakes to eradicate any slack or coils. The bets must be pushed far enough into the ground and at an angle leaning away from the tent.
The bets must be exposed enough for easy removal when shooting adequate and down for slipping a tie-down cord over them. A large rock, mallet or hammer helps drive the stakes/pegs into the ground. Always pack bets.
Place the rainfly over the surface of the tent frame and align the fly's door with the doorway of their inner tent. Please use the buttons or loops onto the inside the rain fly to secure it into the poles and ensure the fly's doors are closed.
Stake the fly in place by pulling the base loops of the fly far away from the inner tent. Be sure you keep up even tension throughout the fly to avoid it out of touching or penetrating the inner tent. This will make it even more efficient in airflow direction and protecting the inner tent from any elements.
Rain can extend out that the fly's stuff, so you need to recheck and readjust the fly's tension regularly.
The last step would be really on securing your shield to the ground or into nearby logs, stones, or trees. Guy-lines make tension throughout the tent, thus creating more stability of the tent against high winds. The outlines also assist keep away the fly out of the inner tent, thus improving ventilation in your tent.
When you have tensioners afterward, the bowline knot will get the job done well. Otherwise, a trucker's hitch will soon be sufficient to tighten the guy-lines at the tent bet. Guy lines are mounted out points on the tent's side that the wind is coming out, but the guy out things can be used evenly across the tent to get insertion that was equal on either side.
A trekking pole may be used in case there isn't any tree or stone nearby.
Try to maintain the guylines perpendicular to the guy out things for increased tent durability. Especially tents can't endure without the usage of guy lines.
Learning how to setup a camping tent can be an invaluable skill to have, perhaps not just for outdoor leisure camping but also for emergencies. A great deal of preparation and practice will go a long way in helping you quickly and efficiently set up a comfy and dry outdoor shelter.


About Alexandra
Content creation is my passion and profession. I am an avid reader which basically inspired me to get into writing. I love to read and know about almost everything under the Sun. Apart from spending time writing and reading, I love exploring new places and getting to know different cultures.
 |
 |
 |
 |
 |
 |
 |


 SimplyCleaver